
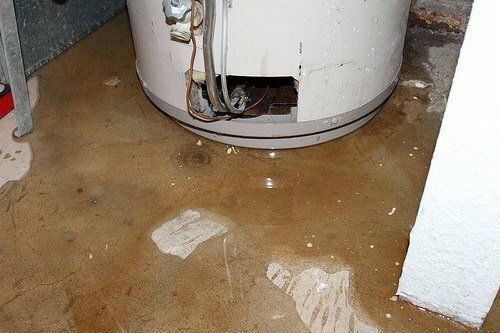
Bad news! There’s a water heater leaking in my basement and what may begin as a small issue, may soon become a major headache if it isn’t dealt with immediately.
A little bit of water can easily be wiped up, but if your little trickle becomes a flood, you have a problem that can do damage to possessions and your flooring, drywalling, and a ceiling below.
The first thing to do is determine where the leak is and if you are at risk of a more severe problem in a brief space of time. You may be able to locate the source yourself, decide if it can be repaired easily, or if you need a new water heater. A call to the plumber may probably be your best option.
Some common causes of water heater leaking are:
-
-
- Age of the water heater
- Incorrect installation
- Plumbing problems due to age
- Lack of or poor maintenance
- Loose valves
- Pressure within the tank
-
The Leaking Water Heater: Where and Is it Serious?
If a water heater has not been installed correctly, sooner or later, there will be a problem.
The first place you can look is the drain valve located near the tank’s bottom. This valve drains sediment from your water heater. If your leak is coming from this valve, that’s really good news because it can be easily replaced and won’t cost you all that much.
If the drain valve isn’t the problem, then the entire water tank needs to be inspected. If you have a water heater leaking from the bottom, it does not bode well.
In this case, there may be quite a build-up of sediment in your tank, and as a result, it has corroded the tank’s bottom. If this is the case, you may have to replace the water heater entirely.
See also: Can old water heater make you sick?
While sediment build-up and drain-valve issues are probably the two most common reasons for a leaky water heater, they aren’t the only ones. Here are some of the most likely causes for a hot water heater leaking:
1.) Inlet and Outlet connections for hot and cold water
This will be an easy repair if it’s the source of your leak. You will need to check the connections of the inlet and outlet pipes to verify if they happen to be loose. If so, you can tighten them up with a wrench. Otherwise, you may need to replace a pipeline that is faulty.
2.) The Valve regulating temperature and pressure relief
This valve plays an important part in keeping your water heater up and running. Its main function is to monitor the temperature of the water and the pressure within the tank.
Pressure problems can be due to too much incoming pressure to the water heater tank or a bad valve.
Should the water become too hot, or the pressure rise too much, this valve is responsible for draining some water out of the water tank. If this valve is the source of the leak, you will see water running down the side of the tank directly from the valve.
You probably will require a new valve because the one you have is broken. Another alternative is that there is too much pressure building in your tank. This pressure is forcing the water out through the valve, basically trying to do its job. You will most likely need a plumber to resolve this scenario.
3.) The Valve that drains the heater
As we stated earlier, this is an easy repair with a limited cost of replacement if the water is leaking from the valve. In any case, check to see that the drain valve is closed completely and tightly. If it still leaks, a replacement is necessary.
4.) The Water heater is leaking from the bottom.
This is probably the most common cause of water tank leaks due to sediment build-up. This will happen especially if you’ve had your water tank for a number of years and the sediment has been building up all this time.
The sediment will corrode the bottom of the tank. With corrosion, the tank will begin to leak. If this condition is due to deterioration and the age of the water heater, you will need to have the tank replaced.
Most water heaters will last anywhere from ten to thirteen years. If yours is leaking from the bottom where the burner compartment is located, the cause may be old age.
What should you do? Regardless, of the reason for your water heater leaking, it is always wise to call a licensed plumber who can verify the source of the leak and what your options are for repair or eventual replacement.
Some of these repairs or replacements can be DIY, however, you need to be sure you have the necessary plumbing skills for both your safety and to limit any damage.
A Water heater leaking from the Top
This type of leak is usually easy to repair. First, it’s necessary to find where exactly the leak originates.
1.) Turn off the power before beginning to work. For gas heaters, turn the thermostat to its “off” position. For an electric water heater, switch off the circuit breaker on the electrical panel.
2.) Find the cold-water inlet which permits water to enter the tank. Leave the valve on to find the leak.
3.) Dry the water heater tank’s top near where the cold-water inlet connects to the tank. If you don’t see any water, use paper toweling to identify the leak’s location. Check out carefully all seals and pipes for leakage.
4.) When you locate the origin of the leak, turn OFF the cold-water inlet valve located on the pipe that connects to the cold-water inlet. The leak should stop.
See also: Bradford White Vs AO Smith Water Heater
Causes for Leaks from the Top of Your Water Heater
There are three basic causes for top leakage:
1.) The Cold-Water Inlet Valve
Usually, water on top of your heater will indicate a leak on the inlet or outlet pipe. Check to make sure the nut just doesn’t need tightening. If that doesn’t fix it, the valve will need to be replaced.
2.) Pipe Fittings are Loose or Corroded
Inlet and outlet fittings, also called dielectric nipples need to be checked for leakage. Check the point of connection. Again, try tightening. If the nipples are corroded, the fitting will need to be replaced. However, if the tank is rusting, you may require a new tank.
3.) Temperature and Pressure Relief Valve
Located on the top or side of the tank, it should be carefully inspected. If there is water leaking, remove it to determine if it needs replacement. Since these valves are for safety purposes, as a rule, it’s better to replace them.
Another aspect you should consider when replacing a water heater is having it removed for safe recycling. Make sure the plumber or repair company you contact can do this for you.
DIY Water Heater Replacement
If you feel confident that you have the correct plumbing skills, here are some basic steps to follow for DIY hot water tank repair:
1.) The first thing to do is shut off the water supply to the water heater, shut off the electrical power for an electric heater, or shut off the gas supply if you have a water heater that runs on gas.
2.) Drain your water heater tank of any water by opening the drain valve at the bottom of the tank, closest to the floor. If there is a full tank, consider attaching a hose to drain run the water into a drain, thus avoiding a mini flood or a mess.
3.) With the tank emptied, disconnect the power wires and water lines for an electric water heater. For a gas water heater, disconnect the gas line, water line, and flue pipe. If the tank is a bit heavy, consider using a dolly or cart for moving the water heater tank.
4.) Clean the area thoroughly before bringing in the new water heater. Once you are ready, position the new heater in its place and begin to reconnect water lines, gas supply or electric power, and the flue pipe for a gas heater. If you are using gas as a power supply, you need to check the joints on the gas line for leaks with soap bubbles.
5.) Once reconnected, turn the gas supply or electric power on and refill the water tank. If the water heater is supplied by gas, do not forget to light the pilot light. Set the thermostat to your preferred temperature and you are ready to use your new water heater.
DIY Water Heater Valve Replacement
If you need to replace the pressure relief valve, this can be accomplished in a few simple steps.
- Shut off the water heater. Close the water supply. Drain some water from the water heater tank.
- Lift up the small lever found on the pressure relief valve to relieve any remaining pressure in the tank.
- Using a wrench, unscrew the valve from the water tank and remove it. Replace it with the new valve.
- Using Teflon tape on the new valve’s threads, screw the new valve onto the water heater.
- Refill the tank and turn the water heater on to use.
If you are seeing other leaks check all valves and fittings on the water heater and on the pipes that connect it. They may merely be in need of some tightening.
The Bottom Line
If you have some plumbing experience and sufficient skills, many of these repairs can be done without assistance, however, if you do not have plumbing skills and experience, it is wise to call a professional licensed plumber to repair hot water heater leaking for your safety and to avoid damage to your property.